Hello everybody, it’s John, welcome to our recipe site. Today, I will show you a way to make a special dish, homemade miso paste. It is one of my favorites food recipes. For mine, I’m gonna make it a bit tasty. This will be really delicious.
Today, I will be showing how to make Miso. Miso is one of the essential seasonings in Japanese cuisine as you already know. We make miso soup, dipping sauce. Homemade miso is a tasty all-purpose seasoning.
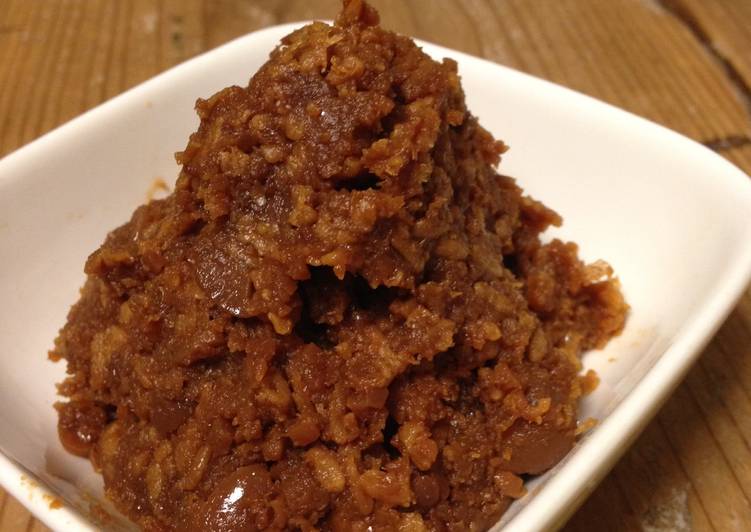
Homemade Miso Paste is one of the most popular of recent trending meals in the world. It’s enjoyed by millions every day. It is simple, it is fast, it tastes delicious. They’re nice and they look fantastic. Homemade Miso Paste is something that I have loved my entire life.
To begin with this recipe, we have to first prepare a few ingredients. You can have homemade miso paste using 8 ingredients and 16 steps. Here is how you can achieve it.
The ingredients needed to make Homemade Miso Paste:
- Prepare 500 g soy beans
- Make ready 500 g Kouji
- Take 250 g Salt (see note below on how to calculate the exact amount)
- Make ready Tools:
- Get 1 bucket or container that can hold 3 liters
- Get 1 sturdy and clean plastic bag that is big enough to line the bucket
- Make ready 1-1 1/2 kg weight for weighing dough miso
- Get 1 inner lid that can fit inside the bucket - it will be used to put on top of miso to hold the weight
You can make miso paste at home using all-natural, organic ingredients with a few hours of prep and a few months If you've ever wanted an alternative to store-bought miso paste, this recipe is for you. Miso paste is one of them. Do you know Japanese miso paste? We call it 味噌(みそ miso) and it's fermented soybean paste.
Instructions to make Homemade Miso Paste:
- You should wash soy beans, and soak soy beans about 14~24 hours. Use 4 times the amount of soy beans for the soaking water.
- After soaking, soybeans look like this.
- Boil the soybeans in plenty of water for about 4 hours.
- When you can easily mash a soy bean between two fingers, it's done! Next you should mash soybeans very well.
- The soybeans look like this after mashing.
- After mashing, weigh the miso so you can calculate exactly how much salt to use (next step)
- Add the weight of soybeans by the weight of koji (here it's 500 g). Multiply that number by 0.12, then divide by 0.88. - - Salt = (weight of mashed soybeans + weight of koji) x 0.12 / 0.88
- Set aside 10% of the salt for sprinkling on top later on. The remaining 90% will be mixed with the koji in the next step.
- Mix the koji and salt well. Then mix in the mashed soybeans very well.
- Make miso-dama - it means miso ball! Make miso balls by tightly squeezing the mix in the palms of your hand. They should be firm and not fall apart.
- Put the balls in a big container lined with a clean plastic bag, and "punch" your miso down! You need to punch out the air, so make sure it's smashed into the container very well with now air pockets.
- Make the top of the miso level.
- Sprinkle with a little salt.
- Wrap an "inner lid" with plastic wrap and put on top of the miso paste. I used a round plastic piece the same size as my container.
- Put a heavy weight on top.
- Wrap up and close the plastic liner bag so it's inside the container. Cover the container with a lid and say good night! See you next year! It takes one year to finish fermenting, but you should check your miso after summer. If your miso smells bad, you should remove any mold and mix up miso! Smash it back down again, put the weight on and finish fermenting.
Do you know Japanese miso paste? We call it 味噌(みそ miso) and it's fermented soybean paste. But of course, I prefer homemade miso paste. Miso paste is a great source of proteins and nutrients. As a fermented food, it's also full of beneficial bacteria Move aside udon, this homemade Japanese Miso Soup recipe is ready to warm you up.
So that’s going to wrap this up for this exceptional food homemade miso paste recipe. Thanks so much for reading. I’m sure that you can make this at home. There’s gonna be more interesting food in home recipes coming up. Remember to bookmark this page in your browser, and share it to your family, colleague and friends. Thank you for reading. Go on get cooking!